
Recipe Details
Sunny-Side-Up Eggs: Classic Technique for Effortless Breakfast Elegance
Updated May 8, 2024 | Total Time: 10 minutes | Servings: 4 | Difficulty: Easy
Introduction
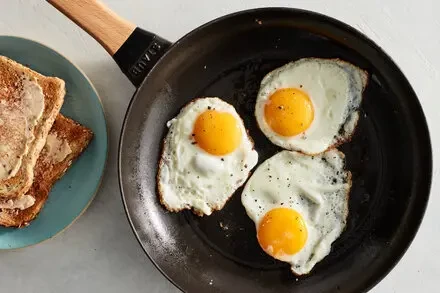
Sunny-side-up eggs are a breakfast staple celebrated for their golden, runny yolks and tender, slightly crisp white edges. This method ensures the egg whites are just set—opaque yet never rubbery—while the yolk retains its liquid richness, making them ideal for pairing with toast, avocado, or as a standalone indulgence.
Ingredients
12-inch nonstick skillet (preferred for even heat distribution)
1 tablespoon neutral oil (e.g., safflower, canola, or avocado oil; high smoke point recommended) or 1 tablespoon unsalted butter (for richer flavor)
4 large eggs (room temperature for optimal texture)
Kosher salt (to taste)
Optional accompaniments: Toasted crusty bread, butter, fresh herbs (e.g., chives), or hot sauce.
Step-by-Step Preparation
Step 1: Prep the Skillet and Eggs
Heat the pan: Place the nonstick skillet over medium heat and warm for 1–2 minutes. Add the oil (or butter, if using). For butter, reduce heat slightly to prevent rapid browning.
Crack eggs safely: Gently tap each egg on the edge of a bowl to break the shell, then pull the halves apart to slide the egg into the pan. Space eggs 2–3 inches apart to ensure even cooking.
Season immediately: Sprinkle a pinch of kosher salt over each egg white to enhance flavor and firm the whites.
Step 2: Cook Until Whites Set
Cook undisturbed for 2–2.5 minutes until the egg whites are just set—edges opaque, center still slightly translucent. This stage balances a tender texture with a runny yolk potential.
Step 3: Finish with Steam for Silky Whites
To ensure the whites remain smooth and opaque while keeping the yolk liquid, use the steam method:
Option A (Lid method): Cover the skillet with a tight-fitting lid and cook for 1–1.5 minutes. Trapped steam gently finishes the whites without drying them.
Option B (Water technique): After whites are set, add 1–2 tablespoons of water to the pan (create a steam bath), then cover. Cook 1 minute more. The water evaporates, leaving a silky sheen on the whites.
Step 4: Serve Immediately
Use a spatula to transfer eggs to a warm plate. Pair with toasted bread slathered in butter, or top with avocado slices, chives, or hot sauce.
Culinary Tips & Community Insights
Pro Techniques
Butter vs. Oil: Butter adds depth, but reduce heat to medium-low to avoid burning. Oil (e.g., safflower) ensures even heat and no flavor interference.
Yolk Safety: Free-range eggs (from home-raised hens) offer superior flavor and reduced pathogen risk. Properly handled, runny yolks are safe; avoid overcooking to preserve richness.
Reader Feedback
"Oil? Butter is better!"—Butter imparts a nutty depth, though lower smoke points require careful heat control.
"Add water to finish whites"—The steam method (water + cover) smooths edges without drying.
"Free-range eggs are safer and tastier"—Pastured hens’ yolks are richer, and outdoor foraging reduces salmonella exposure vs. factory hens.
Advertisement (Note: This section is retained as per original formatting.)
Enjoy your perfectly executed sunny-side-up eggs—crisp whites, runny yolks, and timeless flavor!