
Recipe Details
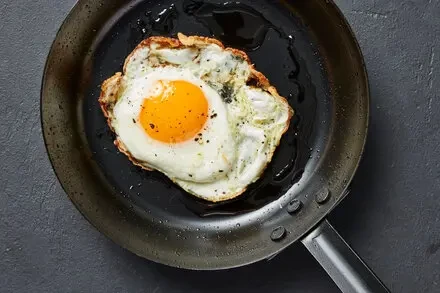
Olive Oil-Fried Eggs: Crispy-Edge, Runny-Yolk Technique
Recipe Overview
Author: Ali Slagle
Last Updated: December 9, 2021
Total Time: 10 minutes (active cooking time: 10 minutes)
Rating: 4/5 (based on 798 reviews)
Reader Engagement: 171 comments
Technique Description
This method achieves the textural duality of Spanish pan-fried eggs (crisp edges) and classic sunny-side-up eggs (set whites, runny yolk). By cooking eggs in a thin, rippling layer of hot olive oil, the exterior crisps while the yolk remains unbroken and liquid. Ideal for breakfast, brunch, or as a savory accent to sides like toast or roasted potatoes.
Ingredients (Scalable for 2–4 servings)
2–4 large eggs (adjust quantity based on servings; use 1 egg per 2 tbsp oil for consistency)
2–4 tablespoons extra virgin olive oil (select a high-smoke-point olive oil for even heat distribution)
Kosher salt (to taste, optional; add during or post-cooking)
Freshly ground black pepper (to taste, optional)
Tools Required
10–12-inch heavy-bottomed skillet (nonstick or stainless steel; even heat retention is critical)
Heat-resistant ladle or spoon (for pouring hot oil)
Flexible spatula (for gentle transfer to plate)
Small bowl (optional, for pre-cracking eggs to avoid shell fragments)
Step-by-Step Instructions
1. Preheat and Oil the Skillet
Heat the skillet over medium-high heat for 2 minutes. Add olive oil, swirling to coat the pan evenly, creating a thin layer (≈2–4mm depth). The oil is ready when it develops a subtle “ripple” (gentle movement) and a drop of water sizzles and evaporates instantly (≈350°F/175°C).
2. Add Eggs to the Hot Oil
Gently crack eggs into the pan, spacing them 2–3 inches apart to ensure uniform cooking. For precision, crack eggs into a small bowl first and pour into the pan (to prevent shell debris). Avoid overcrowding the pan—adjust quantity per serving size.
3. Cook Until Crispy Edges Form
Let eggs cook undisturbed for 1.5–2 minutes. The goal is to develop a “lacy” crisp on the bottom and edges: the whites will turn opaque and golden-brown at the perimeter, with a translucent layer remaining only in the center (near the yolk).
4. Finish the Whites with Hot Oil
Using a ladle, carefully scoop hot oil from the pan and pour it over the exposed surfaces of the whites. Repeat 2–3 times, ensuring all uncooked white areas are covered. The oil’s heat will finish cooking the whites from the top down, leaving the yolk untouched and fully runny.
5. Season and Serve
Sprinkle with salt and pepper (if desired). Use a spatula to transfer eggs to a plate and serve immediately with toast, roasted potatoes, or yogurt to complement the runny yolk.
Pro Tips
Oil Quantity: For n eggs, use n+2 tbsp oil to maintain a thin layer (e.g., 4 eggs = 6 tbsp).
Temperature Control: If oil smokes, reduce heat to medium; rippling oil (not smoking) is optimal for crisping without burning.
Fresh Eggs: For the runniest yolks, use eggs stored at room temperature (not refrigerated) or fresh from the farm.
No Flipping: Unlike traditional sunny-side-up, this technique relies on oil pouring to finish whites, avoiding the need to flip.
Note: This method preserves the yolk’s richness while ensuring the edges are golden and crisp—a balance of technique and timing.